Bellow I will list all the classes and some info on them.
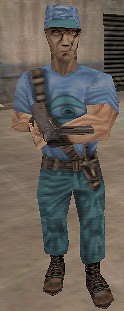
Classes: Scout
Speed: Very Fast
Maximum Health: 75
Starting Armour: 25
Maximum Armour: 50
Hand Weapon: Crowbar
Firearm 1: Single Barrel Shotgun
Firearm 2: Nailgun
Grenade 1: Caltrop Canister
Grenade 2: Concussion Grenade
Special Skills: Disarms detpacks by touching
them. Reveals disguised enemy spies by
touching them.
Scout Tactics:
Run:
The key to a scout's success is speed, a scout can rarely beat other classes at fighting, so it is much wiser to run past wherever possible.
Don't go in straight lines:
Moving left and right while running greatly improves your chances of surviving, simply by making it much harder to hit you for the enemy. Jumping around also helps this, especially as enemy soldiers will be aiming for your feet.
Get others to help:
When you are in a situation where you alone can not get past an enemy unit or sentry gun rather than changing class it is ofter better to tell your team of your problem. Give a fairly precise location of the unit/sentry gun and ask for an offensive soldier/demoman/hw guy to sort it out for you.
Concuss the enemy Use your concussion grenades and throw them at the enemy, this will send them dizzy making it much harder to hit you while you can run past. It is advisable to hold down the grenade for a second or two before letting go to give the enemy less time to dodge it.
"Conc Jump"
It is possible to take great leaps of both land and water using the force of your concussion grenades. It is necessary to time it right (using the timer within the patchs 1.5 onwards) but once perfected you can simply conc jump into the rock2 battlements or well attic.
Use your caltrops:
Once in front of the enemy drop your caltrops which will greatly slow down any unit which steps on them. Be sure not to drop too many on an area you will travel over straight after dropping as they will also slow you down if stood on. 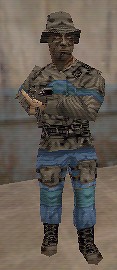
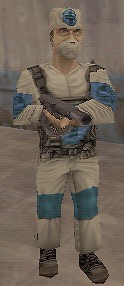
Classes: Sniper
Speed: Medium
Maximum Health: 90
Starting Armour: 0
Maximum Armour: 50
Hand Weapon: Crowbar
Firearm 1: Sniper Rifle
Firearm 2: Auto Rifle
Firearm 3: Nailgun
Grenade 1: Hand Grenade
Special Skills: Zoom with sniper rifle.
Sniper Tactics:
Hold down fire:
Holding down fire on your sniper rifle increases its power for the first few seconds before firing. The red dot becomes brighter, when at its brightest it does the maximum damage.
Stand Still:
Being a rifle you can't fire the sniper rifle effectively while running, you need to slow down, take aim, fire!
Aim for the head:
The higher up the body the more damage it does, hitting the legs will rarely do more than slow them down, hitting them in the head is an almost certain kill.
Use battlements and hiding holes:
The sniper is terrible is close contact so avoid getting near to the enemy soldiers etc. The best way to do this is to use the battlements and other sniping areas found on most maps.
Hide the lasar dot:
If the enemy see the red dot they will make more effort to make it a harder job for you to hit them, keep it in an area where the enemy you intend to hit won't be able to see it.
Finishing them off:
If the innitial shot didn't kill them and they are too close for another go get out your auto rifle to finish the job, especially useful in assasination maps such as Hunted.
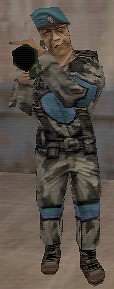
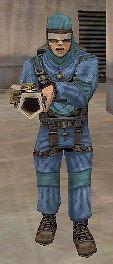
Classes: Soldier
Speed: Slow
Maximum Health: 100
Starting Armour: 100
Maximum Armour: 200
Hand Weapon: Crowbar
Firearm 1: Single Barrel Shotgun
Firearm 2: Double Barrel Shotgun
Firearm 3: Rocket Launcher
Grenade 1: Hand Grenade
Grenade 2: Nail Grenade
Special Skills: None
Soldier Tactics:
Aim for the feet:
Rocket Launchers aren't rapid fire, or a weapon which you can take time and take aim, and if you aim for the head you are more than likely to miss all together. Aiming for the feet is the place most likely to hit them, offering plenty of slash damage from their ankles up.
Reload regulary:
With just 4 rockets loaded at a time it is necessary to reload as often as possible or you will get down to 0, at which time the enemy will have plenty of time to shoot you as you get the shots out painfully slowly between firing off single shots.
Use your Nail Grenade:
The best uses of the Nail Grenade is to clear an area, as enemies will move to avoid it exploding (or die), and to kill sentry guns- thrown at a sentry gun the nails will take away its health and 99% of the time the explosion will take it out.
Rocket Jump:
Rocket jumping is easier than conc jumping, it requires you to look almost straight down, jump, and half way up fire- propelling yourself to the 2fort balcony or other places unreachable with normal jumps. 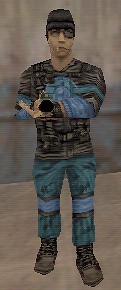
Classes: Demoman
Speed: Medium
Maximum Health: 90
Starting Armour: 50
Maximum Armour: 120
Hand Weapon: Crowbar
Firearm 1: Single Barrel Shotgun
Firearm 2: Grenade Launcher
Firearm 3: Pipe Bomb Launcher
Grenade 1: Hand Grenade
Grenade 2: MIRV
Special Skills: Detonate Pipe Bombs. Lay
Detpack.
Demoman Tactics:
Range:
Demoman is made for close quarters combat, in alleyways and small rooms he can win everytime, but his pipes and grenades just won't cover large distances so try to just run past open areas.
Lay your pipes:
If a defensive demoman a key skill is spreading your pipes out over an entrance and detenating when the enemy comes past. Best used at places where the enemy has to slow down, such as a door.
Detpacks:
The demoman is needed for blowing certain weak walls and rocks away with his detpack. On rock2 the detpack can destroy the rocks blocking the enemies base via the water, and can cause more to fall in your own base's water entrance.
MIRVs:
These are like any other grenades, but last longer and cause more damage overall, as the first grenade splits into 3 smaller ones. Best used in small areas and on HW Guys, who take a lot of damage to bring down.
Classes: Medic
Speed: Fast
Maximum Health: 90
Starting Armour: 50
Maximum Armour: 100
Hand Weapon: Medikit
Firearm 1: Single Barrel Shotgun
Firearm 2: Double Barrel Shotgun
Firearm 2: Super Nailgun
Grenade 1: Hand Grenade
Grenade 2: Concussion Grenade
Special Skills: Both heal friendly units and
infect enemy units with medikit.
Automatically heals itself when wounded.
Medic Tactics:
Heal your teammates:
Your medikit heals your teammates with a single "hit" when touching them with it. Further "hits" will take them 5% over their maximum health as you give them adrenalin. Adrenalin is, however, short lived and the extra health will disappear over time.
Cure your teammates:
Your medikit will also cure disease, wounded legs, hallucination and anything else caused by the enemy. Listen out for the "medic" cry from teammates and if you hear it use your medikit on the wounded friend.
"Conc Jump"
It is possible to take great leaps of both land and water using the force of your concussion grenades. It is necessary to time it right (using the timer within the patchs 1.5 onwards) but once perfected you can simply conc jump into the rock2 battlements or well attic.
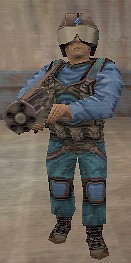
Classes: Heavy Weapons Guy
Speed: Very Slow
Maximum Health: 100
Starting Armour: 150
Maximum Armour: 300
Hand Weapon: Crowbar
Firearm 1: Single Barrel Shotgun
Firearm 1: Double Barrel Shotgun
Firearm 3: Assault Cannon
Grenade 1: Hand Grenade
Grenade 2: MIRV
Special Skills: Not moved by explosives.
Heavy Weapons Guy Tactics:
Give yourself plenty of room:
This doesn't mean stand outside the 2fort base doing a little display for the enemy snipers, it means don't get into small spaces- the longer the space that you will be able to see, and shoot, the enemies- the better. For this reason places like the water tunnel on well are perfect for the HW Guy!
Take out sentry guns:
A lot of the time, if not being shot by enemy units as well, a fight between you (as hw guy) and an enemy sentry gun will come out in your favour, as you can take a LOT of damage!
Stand in key doorways:
Due to your size and refusal to budge when in an explosion standing in doorways will block enemys whose only way past will be to kill you, however HW Guys will normally come out on top!
Classes: Pyro
Speed: Medium
Maximum Health: 100
Starting Armour: 75
Maximum Armour: 150
 a; Hand Weapon: Crowbar
Firearm 1: Single Barrel Shotgun
Firearm 2: Flame Thrower
Firearm 3: Incendiary Cannon
Grenade 1: Hand Grenade
Grenade 2: Napalm
Special Skills: Sets other classes on fire, but is
fireproof.
Pyro Tactics:
Set enemy units on fire:
In close combat with your flame thrower, or distant combat with your incendiary cannon, the pyro is made for setting people on fire. Setting them on fire tends to do little damage but with fire blocking their view this can often provide the confusion for other units to get past.
Fire goes through doors:
The heat from one side of a wall or door sets enemies on the other side on fire, the only weapons that can do this are fire ones, and the pyro is the only class which has them.
Use the napalm grenades:
These explode setting a large area on fire, which the enemy will try to avoid providing the space for your own team to run past as the fire clears.
Don't be a pyro...
It can be fun on public servers but until they are truly as good as other classes they are a big no-no in clan matches and should be avoided. Soldiers, demomen and HW Guys are the better classes 99.99% of the time.
Classes: Spy
Speed: Medium
Maximum Health: 90
Starting Armour: 25
Maximum Armour: 100
Hand Weapon: Knife
Firearm 1: Tranquiliser Gun
Firearm 2: Double Barrel Shotgun
Firearm 3: Nailgun
Grenade 1: Hand Grenade
Grenade 2: Hallucinogenic
Special Skills: Disguise into enemy team. Feign
death. Reveals disguised enemy spies by
touching them.
Spy Tactics:
Disguise as the enemy:
Using the "use skills" key you will get a display and using it can click through to disguise as any class on any team. It doesn't really help to disguise as another class on your own team, your team mates will just get confused and the enemy will still shoot you. But disguise as one of them (while not in their view) and they will see you as one of their own and hopefully will not shoot you.
Think before disguising:
Good spies are good thinkers- disguise as a class they have plenty of in the area you aim to attack. Disguising as a scout and attacking their flagroom is going to make it obvious, disguising as an engineer when the enemy have 2 already is perfect.
Keep your team informed:
A team who doesn't know you are a spy and what you are disguised as will shoot you, as they too will see you as the enemy. Tell them in teamtalk where you are attacking under which disguise.
Avoid detection:
Shooting or running into enemy scouts or spies will loose your cover, so avoid it whenever possible. However using grenades doesn't loose your cover and are perfect for when you have passed an unsupecting enemy guard by laying your hand grenade at his feet for an unfortunate death.
Take out sentryguns:
Enemy sentry guns do not shoot you when you are disguised (and thankfully your own ones don't either!) so you are the best class for killing them. 2 hand grenades is best for the job. Run past the sentry guns, and turn and throw the grenades, when you are in a position where the enemy won't immediately see you in action.
Provide intelligence:
As a spy you will often get further into the base than other classes, at first, so use teamtalk and tell them of sentry gun positions and enemy units positions.
Knife 'em!
Your knife will kill all enemy units with a few swift blows to the head, so get them in the back if they could cause you trouble later on. The best example is on the 2fort spiral- if there is a soldier there knife him in the back giving yourself more time when you come back up the spiral (undisguised) with the flag.

Classes: Engineer
Speed: Medium
Maximum Health: 80
Starting Armour: 25
Maximum Armour: 50
Hand Weapon: Spanner
Firearm 1: Railgun
Firearm 2: Double Barrel Shotgun
Grenade 1: Hand Grenade
Grenade 2: EMP Grenade
Special Skills: Builds, repairs and refuels
Sentry Guns and Dispensers.
Engineer Tactics:
Make, upgrade and maintain the sentry gun:
The key point to being an engineer is building the sentry gun. Choose a good spot where it is hardest to hit and most likely to hit, and make it using your special skills. This requires 130 metal so make sure you have enough first. Then you can rotate it so it is facing the best direction, and upgrade it. A level 1 sentry gun won't last minutes, a level 3 sentry gun can last the whole map if well guarded. Once fully upgraded keep an eye on the bottom left of your screen where it will display the amount of ammo in, and the life of, your sentry gun. When those percentages are low it is simply a case of hitting the sentry gun with the spanner to repare.
Make a dispenser:
Dispensers are not best used for giving teammates armour- there main and best use is for blocking an entrance or whole, and detenating when touched by the enemy. Fill your dispenser with ammo for the maximum explosion. Bind a key which is easy to reach so you can explode it as soon as the "an enemy is using your dispenser" message appears (see configuration for more info on binds).
Help teammates:
The engineer can do 2 things to help teammates. Firstly hitting teammates with your spanner gives them armour, like the medikit gives them health. Secondly, instead of throwing away your metal, you make your metal into ammo which is thrown out in bags. (Default button="x")
Use your EMP Grenades:
In the right situation the EMP grenades are the best in the game. They don't explode themselves but cause any ammo carried by enemy units or on the floor to explode. This won't do much to a scout, but the damage done to a HW Guy will be much greater and if there are bags on the floor which will also explode the explosion will often be fatal.
|